
Getting Started
Creating Your First Project
Section titled “Creating Your First Project”New projects start with an empty clip grid. Here’s the typical workflow:
- Choose a play mode in Preferences → Play Mode.
- Set your Global Output Device in Preferences → Audio.
- Add audio files to the grid.
- Configure each clip: output, fade, gain, retrigger mode.
- Assign keyboard shortcuts or connect a Stream Deck.
- Save the project.
You don’t have to follow this order exactly, but it’s how most operators work.
Understanding the Interface
Section titled “Understanding the Interface”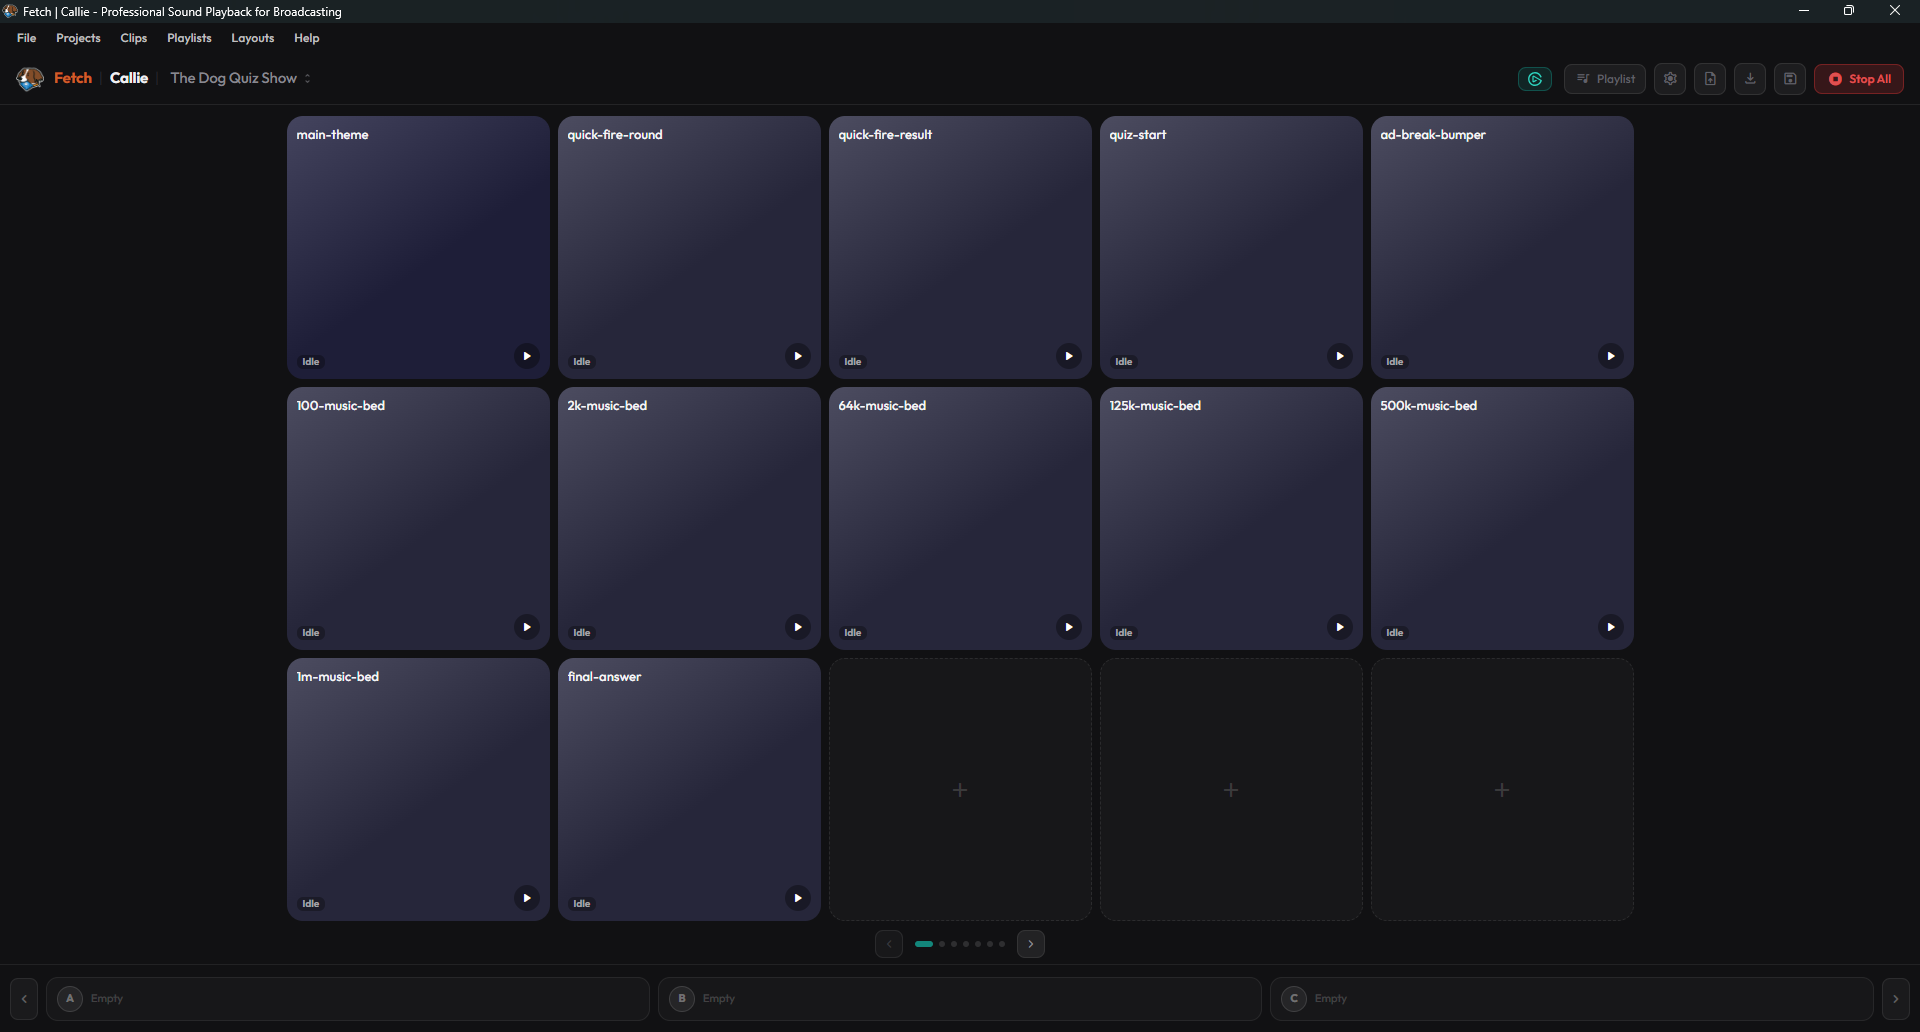
Menu Bar (top):
- File — Save, Export Audit Log, Export/Import Callie Grams Pack, Preferences, Exit. (Shift+click the File menu to reveal Import SpotOn Package….)
- Projects — Open Projects
- Clips — Clear All Clips, Clear Output Assignments
- Playlists — Show Playlist Panel
- View — Live Output View
- Layout — Desktop, Desktop 4:3, your saved Custom layouts, Stream Deck XL/Standard/Mini/Plus
- Help — Check for Updates, Licensing, About Callie Grams
Header Bar (below menu):
- Logo and project name — click the project name to open the Projects window
- Timecode display — shows the current incoming timecode source and value
- Stream Deck status pill — green when connected, grey when not
- Playlist toggle button
- AI stem-split progress — appears while vocal removal is running
- Action buttons — Settings, Fullscreen, About, Audit Log, Stop All
Warning Banners:
Callie Grams may show banners below the header for:
- Missing audio devices
- Volume muted or below 100%
- Elgato Stream Deck software blocking the device
Clip Grid (centre):
The main area shows your clips arranged in pages. Each button displays:
- Clip name
- Background color
- Shortcut key (if assigned)
- Output letter badge (if assigned in Default mode)
- Slot number, shown as
1a,2b, etc. - Playback progress while playing
- A speed badge (e.g. ×1.25) when varispeed isn’t 1.00×
- A barber-pole edge ring while playing; clips protected from Stop All show it too
- A red flashing Media Missing state if the clip’s audio file can’t be found
Hover almost anything — header buttons, clip cards, carts, chrome — and a tooltip explains what it does.
Page Navigation:
If your project has more than one page, page buttons appear at the bottom of the clip grid. You can also navigate pages via Stream Deck.
Optional Panels:
- Cart Strip — a compact view of active outputs and their remaining times (toggle in Clip Settings or via Layout)
- Gang Editor Banner — appears when you are editing gangs
- Playlist Panel — browse and manage playlists
There is no traditional transport bar; the main controls live in the header and the clip grid. For output metering, open the Live Output View (View menu or header button).
Navigation
Section titled “Navigation”Pages: Projects can contain more clips than fit on one screen. Use the page buttons at the bottom of the grid to switch pages, or navigate with Stream Deck.
Clip Settings: Right-click any clip and choose Edit Clip to open Clip Settings. This is where you configure:
- Name and color
- Output and slot
- Fade in / fade out
- Gain
- Playback speed (varispeed)
- Protected from Stop All
- Quick Fire
- Retrigger mode
- Loop blocks
- Skip blocks
- Markers
- Pre/post actions
- Timecode cues
Context Menu: Right-click a clip for quick actions:
- Load or replace the audio file
- Edit Clip Settings
- Reveal file in Explorer/Finder
- Copy Clip
- Change to Action (Stop All, Stop Gang, Stop Output)
- Fire Gang
- Gang assignment
- Playlist assignment
- Clear Clip
The context menu also shows a quick-actions panel with a gain slider, normalise buttons, output letter grid, and MIDI learn when a MIDI input is configured.