Assigning Audio to Video
The core workflow: connecting audio sources to video destination channels.
Drag and Drop
Section titled “Drag and Drop”This is where the interface really shines. Instead of typing assignments into a spreadsheet, you drag them visually.
Here’s how:
- Find your audio source in the left panel
- Click and hold on the audio channel button
- Drag it over to the right panel
- Hover over an empty video channel slot
- Release the mouse button
The audio source label appears in the video slot. Job Done!
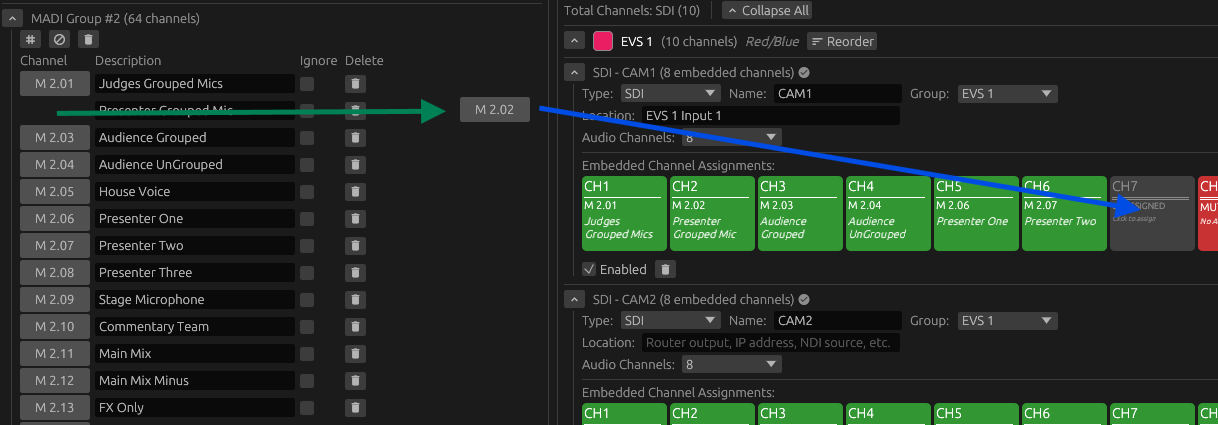
Visual feedback during drag: You’ll see the audio button follow your cursor - Invalid targets stay unchanged, and a drop shadow indicates you’re dragging something.
Multiple assignments:
One audio source can assign to multiple video destinations.
Drag the same audio button to multiple slots.
Each video channel gets its own assignment.
Removing/Muting Assignments
Section titled “Removing/Muting Assignments”Click an assigned slot to cycle through states: Assigned → Muted → Clear (empty).
Muted state shows the assignment but mutes the audio channel in the video output. This means it won’t alert in the routing check as missing source.
Clear removes the assignment entirely, returning the slot to empty state.
The audio source button remains available for other assignments.
Changing Assignments
Section titled “Changing Assignments”To change an assignment, remove the old one and add the new one.
Or drag a new audio source directly onto an occupied slot (replaces existing assignment).